Enjoying The Perfect Cup Of Coffee While Camping…And More
The scent of campfire smoke wafts through the crisp night air.
Stars overwhelmingly dot the, otherwise black, nighttime sky above, painting a still, peaceful canvas for you to gaze upon as you restfully enjoy the evening with your loved ones.
Strings of gooey marshmallow pull from your lips, and creamy, smooth chocolate slowly melts in your mouth as you bite into a freshly prepared, flame-kissed s’more.
The tent you’ve erected will soon shield you against the elements, providing you a serene, though potentially not all that restful, slumber…unless you’re snuggling up in an RV, of course.
Ah, camping. A summertime favorite for many.
You spend days in preparation, ensuring you have all you’ll need to survive, and pleasantly enjoy, the trip. You make the most of each moment, away from the business of life, waking with the dawn, spending your days hiking, swimming, fishing, and more.
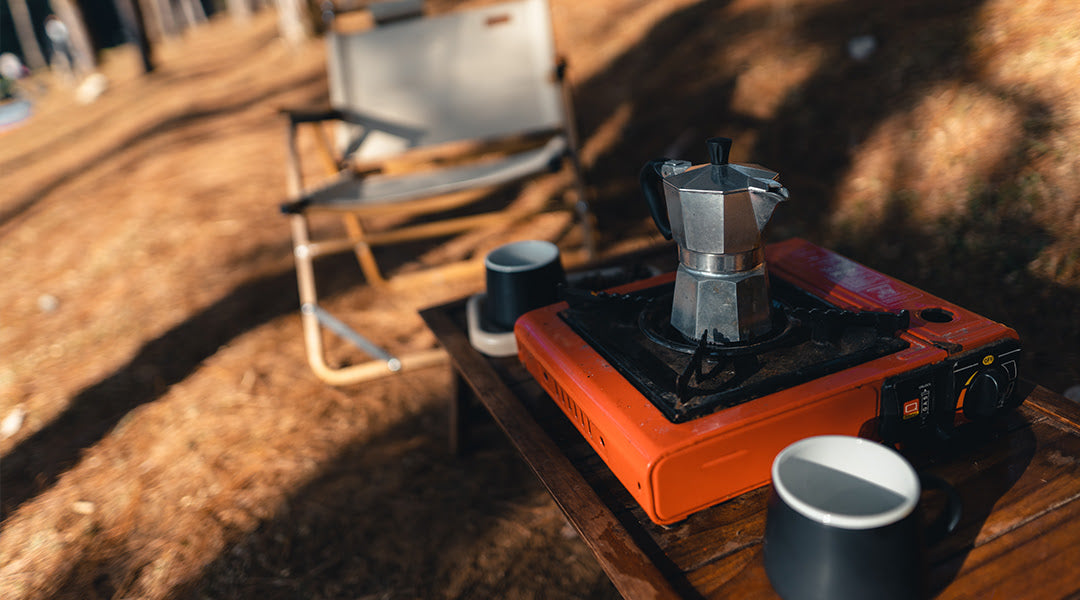
Then, as the sun calms its blazing daytime rays, you relax around a campfire cooking, laughing, sipping coffee, and soaking up love and laughter shared amongst friends and family.
Today, we’ll explore all the things that make camping such a wonderful summertime activity, including some tips for what you can bring along on your adventure and how to make the perfect cup of coffee while you’re roughing it.
Camping Prep Basics

My earliest memories of camping involve a worn, tarp-like, blue tent, and begging my parents to let us kids camp out in our backyard…alone.
Upon their consent, we spent the better part of a day making a list of all the supplies we needed, then gathering said supplies to show we were ready, willing, and capable of spending the night outdoors all on our own. Did I mention I was roughly 7 years old at the time?
Tent, check. Sleeping bags, check. Plenty of flashlights…and batteries, check. Snacks, check. Water, check. Wood for the fire…no check…we were just kids, you know.
Camping as an adult, while it involves a bit more consideration than my childhood backyard camping adventure, often begins in the same manner, pondering all the items you’ll need while away from home.
If you’re a camping pro, you might be able to let us know of a few extra suggestions here, but if you’re a beginner, consider the following items to include on your trip to ensure your adventure goes well.
First, do you have a campsite in mind? If you’re leaving on a camping vacation, complete with an RV, you’ll definitely need to reserve a location. And, even if you’re simply setting out to enjoy a true wilderness camping adventure, sans RV, you still may need to do a bit of planning by calling ahead to make sure your location/campsite is ready and safe.
One recommended site for reserving campsites is https://www.recreation.gov/

And, while searching for a campsite, be sure to inquire about the following:
- Does the campsite have any fire restrictions?
- Are there bathrooms/showers on site/nearby?
- Is there firewood available?
- Water nearby?
- Where is the nearest grocery store/gas station?
When choosing a campsite, plan ahead by brainstorming some potential activities you’d like to engage in while adventuring:
Do you want to fish or swim? Check for nearby pools, lakes, or rivers.
Do you plan on hiking? Look up trails in the region.
Then, iron out your dinner details, planning how many meals you’ll need, what foods you’ll bring, how you plan to cook your meals, and how much liquid (gotta hydrate) you’ll need as well as any other supplies pertaining to your food/drink needs while away.
As you plan these details, I’d suggest making a list of recipes/foods you plan to make, including snacks and drinks. Then, make a grocery list of these items.

Go through each recipe and meal idea, then make a separate list of all the items you’ll need to cook or prepare these foods. And, since you obviously don’t want to actually pack the kitchen sink, think practically here, only including items you truly need.
Speaking of planning, to ensure you’re not loading your vehicle at the last minute, scrambling to remember each thing you’ll need, start the process of planning and organizing a few days prior to your departure.
Maybe this means you’ll begin lining up the items you’ve packed in your laundry room or garage in preparation, or maybe this means loading up one section of your refrigerator or pantry for “trip only” foods, either way, don’t wait until the last minute to gather all you’ll need for your trip.
When camping, organization is definitely your friend!
And, as you plan and organize, be sure to inspect as well. If it’s been a while since you’ve last used your tent or camp stove, make sure they are in working order prior to packing (and leaving).
Another part of planning involves checking the weather at your destination. What’s the forecast look like? Will you need rain gear? Extra water to hydrate due to extreme heat? Like organization, planning ahead is also your friend!
Then, when it comes to the specifics, here’s a broad checklist of categories and respective items to consider for your trip:

1. Be sure to include personal items, while not used for camping, you will likely need them at some point as you, or if you, travel.
- cash
- credit card
- ID
- phone
2. Include any protective items you may need.
- sunscreen
- aloe
- sun hats or glasses
- bug repellant
- lip balm (with or without spf)
3. Hygiene items that you’ll need to include will vary depending on your personal needs and the facilities (or lack thereof) at your campsite. But, some ideas include:
- toothbrush/paste
- menstrual products
- soap/shampoo/conditioner (if you have a place to shower)
- toilet paper
- a portable camp shower (if you have one)
- brush/comb
- antiseptic wipes, sanitizer
- towels
4. Don’t forget any health items, and check prescriptions prior to leaving to ensure you have enough for while you’re away.
- prescription medications
- first aid supplies
- glasses/contacts/contact solution and case
5. Clothing - as this will vary per person/family, we won’t include a list. Just make sure you’re appropriately prepared for weather conditions and any activities you plan to engage in while on your camping adventure. Maybe include an umbrella, rain jacket, swimwear, extra socks, hiking boots, etc.
6. Be sure to include any activity needs in your packing list as well: for you, your children, pets, etc.
- games/toys
- books
- notebooks/pen/pencil
- binoculars
- music
- pet supplies
7. The list of gear you’ll need to set up your campsite can be daunting, but plan to scour this list with your personal needs in mind.

Are you more of a minimalist? Not camping for more than a night or a weekend? You may not need to pack as much. Of course, this also applies to the items we’ve mentioned thus far.
- tent
- sleeping bag/sleeping pad
- camping pillow
- flashlights or lanterns
- batteries or fuel for lanterns
- foldable chairs
- table (if no picnic tables are available on the campsite)
- firewood
- hammock or cot
- mallet or hammer
- extra rope
- multi-tool
- duct tape
8. As we mentioned earlier, plan ahead for recipes and make a checklist for food items you’ll need for cooking. Also, check to see if your campground has drinking water available. If not, be sure to bring a way to treat pond/lake water or bring your own water entirely.
- camping stove or grill and fuel
- Firestarter
- pots/pans/protective gear for handling them while hot
- plates/bowls/cups/utensils (including knives for food prep)
- cutting board
- cooler
- wash bins and soap/scrubbing items
- trash bags/bins
- water bottles and/or water jugs
- cooler with ice
Now, did we forget anything?
Of course we did…we can’t go camping without coffee! And, we’ve got all the details you need to make the perfect cup while you’re out adventuring.
How To Enjoy The Perfect Cup Of Coffee While Camping
 One of my favorite ways to enjoy a freshly brewed cup of coffee is outside, on my porch, watching the sun greet me in the blue sky, surrounded by lush green trees, the colorful flowers I’ve planted nearby, all while being serenaded by chirping, singing birds.
So, when camping, completely immersed in the beautiful sights, scents, and sounds of nature, enjoying a truly great cup of coffee…just as great as you’d brew at home…is a must.
But, campfire heat can be hard to regulate. And, grinding your beans proves problematic if you’ve left your grinder at home (or if you only have an electric version).
Then, what about brewing? If you’re accustomed to using a drip coffee maker, camping can present a few complications in that regard as well.
When it comes to brewing a truly great cup of coffee while camping, I approach this process the same way I do camping in general.
First…plan/prepare.
Then…gather your needed items.
And…I’ve even known folks who’ve practiced their coffee brewing plans at home prior to leaving for their camping trip to ensure they’ll enjoy the perfect cup of joe while away.

Failing to plan can lead to either settling for burnt brews or no brews due to a lack of needed equipment. And, if you’re used to enjoying a cup (or several) each day, going without while away can lead to unwanted symptoms, especially while you’re camping.
Unless you primarily consume decaf coffee, going without your daily caffeinated brew all of a sudden can result in headaches, sleepiness, difficulty concentrating, and mood swings.
So, let’s get down to some camp-coffee basics:
- Don’t settle for a subpar brew just because you’re traveling. Be sure to bring along quality coffee.
- If you have room for a portable hand grinder, use whole beans as this will result in a better tasting brew. And, try to only brew what you need at the time. *Don’t forget your scoop or measuring spoon for your coffee as well.
- Never boil your water. Water boils at 212 degrees Fahrenheit, so heat your water to just under boiling (200-205 degrees). *If your water does reach a boil, simply remove the kettle from the heat source and allow it to cool a bit prior to making your java. You can even add a bit of cold water to tame that temp a little faster.

Now, obviously you’ll need something to brew your coffee in, and there are actually a lot of options when it comes to this step. So, let’s explore the top 5 ways to brew the perfect cup while camping:
1. You can opt to bring Lifeboost Go Bags on your trip.
These completely take the guesswork out of measuring. They negate the need for grinding. And, you’ll basically have a built-in brewing method.
All you’ll need to do is heat your water, pour it into your mug, and place the bag in the water to steep until your desired strength of coffee is reached.
2. Many opt for making what is commonly referred to as “cowboy coffee” while camping. This method simply requires a kettle or a pan to make the coffee in (and water and coffee too, of course), and it will make enough coffee for a crowd.
I will warn you, however, this method of brewing can often leave some remaining grounds in your mug, unless you have a pour-over style filter you can place over your mug to pour the coffee through.
To make cowboy coffee, you simply:
- add cold water (must be cold) to a pan or kettle
- add one heaping tablespoon of grounds per 1 ½ cups of water
- place your pan or kettle over your heat source and heat till just before boiling
- remove from heat, add just a splash of cold water, and allow the brew to rest while the grounds settle
- once the grounds settle, pour the prepared coffee into your mug *if you’re able to bring a metal or mesh pour over filter, you can place this over your mug to ensure no grounds end up in your coffee

3. If you’re bringing a pour over filter to ensure your cowboy coffee isn’t full of grounds, you might as well try your hand at brewing a traditional pour over. Though, this method is best for one or two campers only, as you’ll be making single servings.
To do so, you’ll need a pour over dripper and a metal or paper filter to use with it. Then, all you have to do is:
- put the pour over dripper over your coffee mug, placing the cone filter in the dripper
- add 1-2 tablespoons of ground coffee to the filter per 1 cup of water you plan to pour over the grounds
- heat your water to just under a boil
- slowly pour the hot water over the grounds, waiting approximately 1 minute for the coffee to bloom, then add the remaining water in a circular pattern from the outside towards the middle until your mug is full (then remove the filter)
4. If you don’t mind bringing glass items along with you on your camping trip, making coffee in a French press is a great way to enjoy a bold, delicious brew while you’re out enjoying nature. *Some brands even make French press koozies to keep your coffee warm and protect the glass press.
Obviously, you’ll still need a kettle to heat your water, but other than that and your coffee (and scoop and grinder if you’re grinding your beans), you’ll basically only need your mug and the press. Simply start by:
- heating your water in a kettle over your heat source until just below boiling
- then, remove the plunger/top of the press and add in 1-1 ½ tablespoons of ground coffee (or more to taste)
- pour the heated water into the press, over the grounds
- place the plunger/top on the french press, but do not depress the plunger yet
- after the coffee has steeped/brewed for 4 minutes, press the plunger down to the bottom of the press
- pour the prepared coffee into your mug

5. One of the most popular methods for brewing coffee according to camping pros is by using an Aeropress. An Aeropress allows you to adjust the strength of your brew, it’s small which makes for easy packing, and the clean up is easy with this method as well.
To brew with an Aeropress, simply:
- heat your water over your heat source to just below boiling
- place the filter in the filter basket of the Aeropress and attack the basket to the brew chamber
- once assembled, place the brew basket on your mug
- add medium-fine ground coffee to the press (1-2 tablespoons per cup of water)
- fill the brew chamber with the heated water
- stir for 10-15 seconds allowing for settling and dripping
- as the brew chamber drains, add any remaining water
- insert the plunger into the Aeropress and slowly apply downward pressure until you can hear air pressing through the grounds at the bottom
- remove the press from your mug
Check out Lifeboost Coffee Go Bags.

Becky is a mother, educator, and content writer for Lifeboost Coffee. She has had three years’ experience as a writer, and in that time she has enjoyed creatively composing articles and ebooks covering the topics of coffee, health and fitness, education, recipes, and relationships.
- https://cabotcreamery.com/blogs/how-to-guide/7-ways-prepare-camping-trip
- https://www.rei.com/learn/expert-advice/family-camping-checklist.html
- https://www.webmd.com/diet/ss/slideshow-what-happens-when-you-give-up-caffeine
- https://www.freshoffthegrid.com/camp-coffee/
- https://www.homegrounds.co/how-to-make-coffee-while-camping/
- https://www.takethetruck.com/blog/camping-coffee
- https://promoleaf.com/blog/how-to-make-coffee-while-camping
- References for the article to confirm data and information.
Drop a Comment
I wish there was a sample pack at a reasonable price.


