


Learn the Art of Making the Perfect Stovetop Percolator Coffee
For those looking to switch things up and bring a bit of retro charm into their morning cup of coffee, why not try out a stovetop percolator? While many assume this method is the worst way to brew a pot of java, it all comes down to individual taste.
With the right type of beans, you could find that this brewing method creates an even richer and more flavorful cup than your automatic drip coffee maker. So don't write it off until you've tried it for yourself. Who knows- the percolator may become your new favorite way to make a pot of great-tasting coffee.
Plus, exploring different brewing methods can be fun and exciting. Whether a coffee aficionado or just starting, trying new techniques can help you create the perfect drink. Step out of your comfort zone and experiment with different beans and brewing methods - like a stovetop percolator - to craft an unforgettable cup of coffee each morning. You won't be disappointed in the flavor you can achieve.
WHAT IS A STOVETOP PERCOLATOR?

A percolator is an old-style coffee brewer that uses steam to extract the maximum flavor from ground coffee beans. It consists of a tall, thin pot connected to a heat source. The inside of the pot contains a chamber with a filter that allows steam to pass through it and saturate the grounds, extracting their flavor as it passes through. This method is different from pour-over brewing as clean water does not pass through the ground coffee layer in this case.
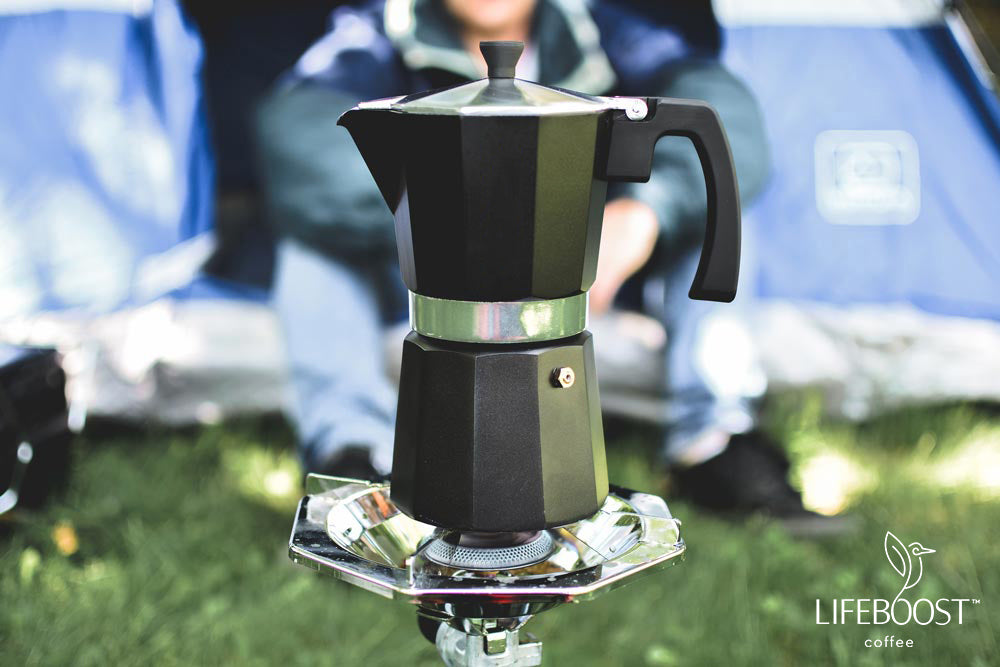
Other vacuum-based brewers, such as siphon and Moka pots, are also popular for producing powerful beverages. While both methods create strong brews, Moka pots produce an espresso-style drink, while Siphon coffees tend to be lighter in taste.
Additionally, a Moka pot differs from a stovetop percolator in that it only passes the coffee once through its chamber, as opposed to continuing cycling until taken off the heat source. It makes the percolator a great choice for those who prefer a particularly robust flavor and strength of their brew. On the other hand, with Moka pots, you can control more precisely how much flavor is extracted from your coffee beans by manually removing them from heat when desired strength has been reached.
A BITTER BREW

Hanson Goodrich designed the classic stovetop percolator in 1889 to remove grounds and impurities from brewed coffee. Unfortunately, this method has acquired a reputation for producing bitter brews that lack flavor. But with some knowledge of the brewing process, it can be possible to produce great-tasting coffee using this old-fashioned contraption.
High heat is necessary to create steam pressure when brewing with a percolator. Nevertheless, those high temperatures tend to bring out the metallic taste in the stainless steel appliance. They recommend closely monitoring the brewing temperature while using these tools to reduce this effect.
Brewing temperature isn't the only factor that affects taste; the percolator's work also needs to be considered. When steam is used to soak pre-ground coffee, the extracted liquid drains back into the water chamber, where it is reheated and re-steeped multiple times - leading to over-extraction. To avoid this, pay close attention to the time your coffee spends in the chamber.
STOVETOP PERCOLATORS: AN ACTIVE BREWING METHOD

Traditional stovetop percolators provide an active and mindful way of brewing coffee. Rather than being able to just turn it on and leave, like with a drip coffee pot, you must pay attention to the percolator as it brews your coffee. It allows for greater control over how strong or weak you'd like your coffee to be and can also serve as a calming ritual at the start of your day.
Although the stovetop percolator method might require more effort, it is worth every second; you'll be left with unbelievably delicious flavors that cannot be achieved through any other type of brewer. Plus, if maintained and cleaned properly, these machines can last many years.
HOW TO MAKE COFFEE WITH A STOVETOP PERCOLATOR
Brewing coffee with a stovetop percolator takes some finesse, but it is easy to master once you understand how it works. Monitoring the heat of the water closely and learning to trust your instincts are essential for making a great cup of java. It's best to check on your brew every two minutes until you have reached the desired strength and flavor. It will ensure that your delicious drink created using a stovetop percolator can satisfy even the most particular coffee drinkers.
WHAT YOU NEED

To make an old-fashioned cup of coffee using a stovetop percolator, you will need the following supplies:
- Freshly ground, whole coffee beans
- A coffee grinder
- Water
- A spoon for measuring out the grounds
- The stovetop percolator itself
- Your favorite mug
With these items, you'll be well on your way to brewing a delicious cup of java.
STEP ONE: GRIND AND MEASURE YOUR COFFEE

Once ready to grind, remove your burr coffee grinder and your favorite gourmet beans. Percolators require a coarse grind, which you would use when using a French press. Before beginning the grinding process, ensure that your grinder can produce this size of grind.
When your coarse grind is all set, it's the perfect time to measure. An incorrect coffee-to-water ratio usually hinders you from getting a flavorfully rich drink. The volume of your stovetop percolator plays an essential role in delighting your tastebuds with every sip; therefore, ensure you get a precise measurement for each scoop. (Pro tip: Use a coffee scale to guarantee exactness.
To make the perfect cup of coffee, one should use a tablespoon per cup - but don't be afraid to adjust this amount depending on your taste. Any leftover grounds should immediately be stored in an airtight container for future brewing.
STEP TWO: ASSEMBLE AND FILL THE PERCOLATOR

Now is the ideal moment to begin assembling your percolator. Be sure to insert the pump stem and then fill up the reservoir with frigid water.
Next, delicately place the filter basket within the brewer and carefully scoop in your freshly ground beans (or pre-ground coffee if that's more your speed). Remember to watch out for overfilling - percolators usually create a strong drink, so it's best to adhere to the "less is more" principle. Not only will this produce an exceptional brew, but you'll also be able to savor every last bit of those precious beans.
Place the cover on top of the filter if it comes with one, and you're all set. Now ready to close up your percolator.
Although assembling your percolator may vary slightly depending on the brand and model you select, it should generally abide by the guidelines. If this step has caused some confusion for you, don't worry- simply consult the manufacturer's instructions for assistance.
STEP THREE: TURN UP THE HEAT
For a slowly brewed cup of coffee, set your percolator on the stove – whether in your kitchen or nature – and adjust the heat to low or medium. Boiling water creates burnt-tasting results, so you should take extra care with this step for an enjoyable drink.
It will begin bubbling when your hot water is ready to steep the coffee. To preserve this optimal temperature, you must ensure that bubbles arise from the glass knob at regular intervals - about a few seconds apart. If the continual emergence of steam means that the liquid is boiling, then simply turn down the heat; conversely, if there are too many pauses between bubble formation, dial-up just a bit more.
STEP FOUR: LET IT PERK

Once the water boils, it's time to set your timer for six-to-eight minutes so that you can get a perfectly brewed cup of coffee. Depending on how strong you want it, this time can be adjusted accordingly - if you desire a weaker brew, reduce the brewing time to less than 8 minutes; if you favor a stronger cup, increase it to as much as 10 minutes. Leave the coffee to percolate too long may give it an overly strong flavor. With just a few tweaks here and there, you could easily make your favorite cup of coffee in no time.
STEP FIVE: REMOVE IT FROM THE HEAT
As soon as the timer signals, immediately switch off your stovetop or burner and cautiously remove the percolator. It will be incredibly hot, so secure yourself with a cozy oven mitt or kitchen towel before handling.
Before you can savor that first sip, take a moment to remove those used grounds from the coffee basket. Though it may seem like too much effort at the time, this step is necessary if your percolator has weaker seals blocking off its reservoir and basket; otherwise, there's potential for more grinds than java in your mug. Trust them; nothing is worse than gulping gritty sludge rather than a deliciously smooth brew.
STEP SIX: ENJOY

Now that you've finished the brewing process, it's time for a reward. Pour yourself a delicious cup of freshly-made coffee from your percolator, savor the taste, and enjoy your hard work. Don't forget to dispose of the grounds properly - throw them away or add them to your compost pile. Now that everything is clean and put away, sit back and relax with your fresh drink.
Making coffee in a percolator is an easy yet enjoyable process. From grinding your beans to discarding the used grounds, each step should be followed carefully for optimal results. With this guide and some practice, you will soon become a master barista and enjoy delicious drinks made just how you like it. Don't forget to store any leftover grounds immediately in an airtight container for future brewing. Now that you know all these tips and tricks, start your percolating journey.
Frequently Asked Questions
How do you know when the percolator coffee is made?
The best way to know when your percolator coffee is made is by listening for the bubbling sound - it should come in regular intervals. If you hear consistent bubbles, the coffee is ready. It's also important to be mindful of the timer and adjust the heat accordingly if necessary. As a general rule of thumb, they suggest allowing your brew to perk for 6-8 minutes; any longer may cause an overly strong drink.
Do you need a filter for a percolator?
Yes, a filter is necessary for a percolator. Not only does it keep coffee grounds from ending up in the final product, but it also helps to ensure that all of the flavors and aromas of the beans are fully extracted during steeping. It provides an intense yet smooth cup of coffee free of stray grounds or undissolved particles. Filters also work to contain the grounds while they steep, ensuring that each infusion tastes freshly brewed and delicious every time.
Which is better: a stovetop or an electric percolator?
It depends on personal preference and the results you're looking for. Stovetop percolators are often manual, meaning you can control how much heat is applied to the pot and when it's removed from the stove. It can be beneficial if your goal is a milder cup of coffee or one that brews for just the right amount of time. Electric percolators, on the other hand, are quicker and more efficient- plus, they come with an array of temperature settings so you can customize your brew even further. Ultimately, either option will yield great-tasting coffee - it's all about finding what works best for you.
Does percolator coffee taste different than regular drip coffee?
Percolator coffee has a distinctive flavor that many people find more intense and bolder than regular drip coffee. The main difference is that with the percolator strategy, the hot water is circulated multiple times through the same coffee grinds, allowing it to extract more flavor than a single-pass drip-brew. This process results in a richer and fuller-bodied cup of coffee with an unmistakably bolder taste than normal drip coffee. It's sure to please the most discerning of coffee drinkers.
Can I use regular ground coffee in a percolator?
Absolutely! Regular ground coffee can brew a delicious drink in your percolator. All you need to do is measure out the desired amount of beans, add them to the basket, and then attach it to the reservoir. Next, fill up the pot with water just below the top of the basket and place it on the stovetop or plug it in (depending on your model). Finally, turn up the heat or start the timer and let the brewing process begin - it's as easy as that.
How does an electric percolator cognize when to turn off?
Electric percolators use an internal thermostat to detect when the water has reached the optimal temperature and will shut off automatically. It ensures you don't have to worry about over or under-brewing your coffee. Some models also come with adjustable temperature settings, proffering you to customize your brew according to preference.
Now that you know all the basics of percolating, it's time to get brewing. Whether you choose a manual or electric model, always follow these steps for steaming perfection.
Why is my percolator coffee weak?
Weak percolator coffee can occur for several reasons. The most common is not using enough ground coffee - the goal is to keep the water-coffee ratio balanced. If you use too much water and not enough ground, your brew will be weaker than desired. Additionally, leaving your pot on the heat for too long can lead to over-extraction, resulting in a weak drink. To fix this issue, simply adjust the number of grounds used and the brewing time until you reach the desired strength level.
Can you use a percolator for making tea?
Absolutely! Percolators are just as suitable for brewing tea, provided you can adhere to the same steps outlined above but with different "grinds". For the perfect cup of tea, swap out coffee with your favorite loose-leaf variety and infuse the water for 4-6 minutes - just as you would with coffee. You can also experiment by adding your favorite spices and herbs for an even more delicious cup.
Check out Lifeboost Coffee Embolden Dark Roast.
- https://shop.carrabassettcoffee.com/blogs/coffee-facts/how-to-brew-coffee-using-a-stovetop-percolator (opens in new tab)
- https://www.coffeedetective.com/stove-top-coffee-percolator.html (opens in new tab)
- https://www.roastycoffee.com/stovetop-percolator/ (opens in new tab)
- https://www.homegrounds.co/history-of-coffee/ (opens in new tab)
- https://kopiluwakdirect.com/middle-east-history-culture/ (opens in new tab)
- https://royalsociety.org/about-us/who-we-are/history/ (opens in new tab)
- https://wol.jw.org/en/wol/d/r1/lp-e/102006087#h=7 (opens in new tab)
- https://en.wikipedia.org/wiki/History_of_coffee (opens in new tab)
- References for the article to confirm data and information.
Drop a Comment
How terribly confusing to a person who is attempting to actually learn something. This whole article is talking about percolated coffee and how long you should let it percolate but every single photograph is showing an espresso maker which does not percolate at all. The coffee in this pot is made as the water in the bottom of the pot is heated and is then fed up through the grounds and then fills the top part of the pot. The water only filters through the grounds one time essentially making it closer to a drip pot. You should have been showing photos of an actual percolator.


